What you can make with the Box designer
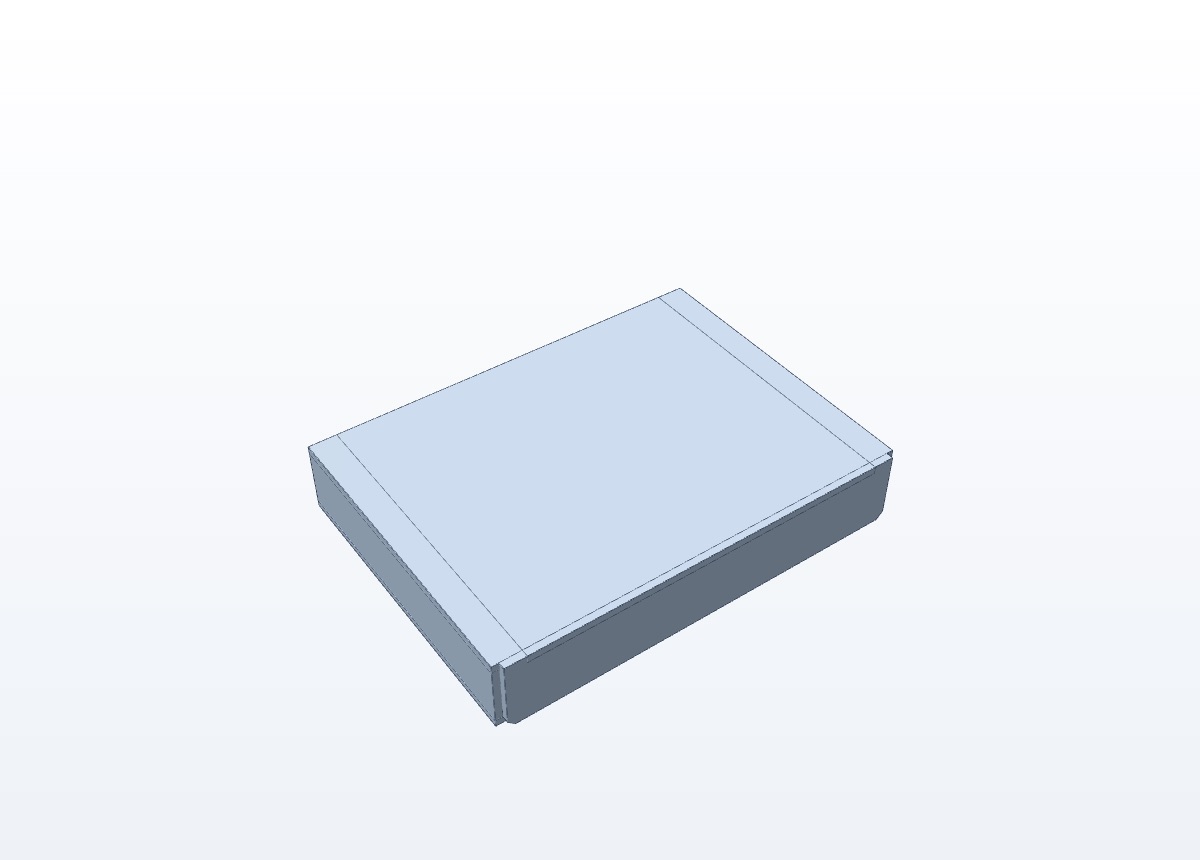
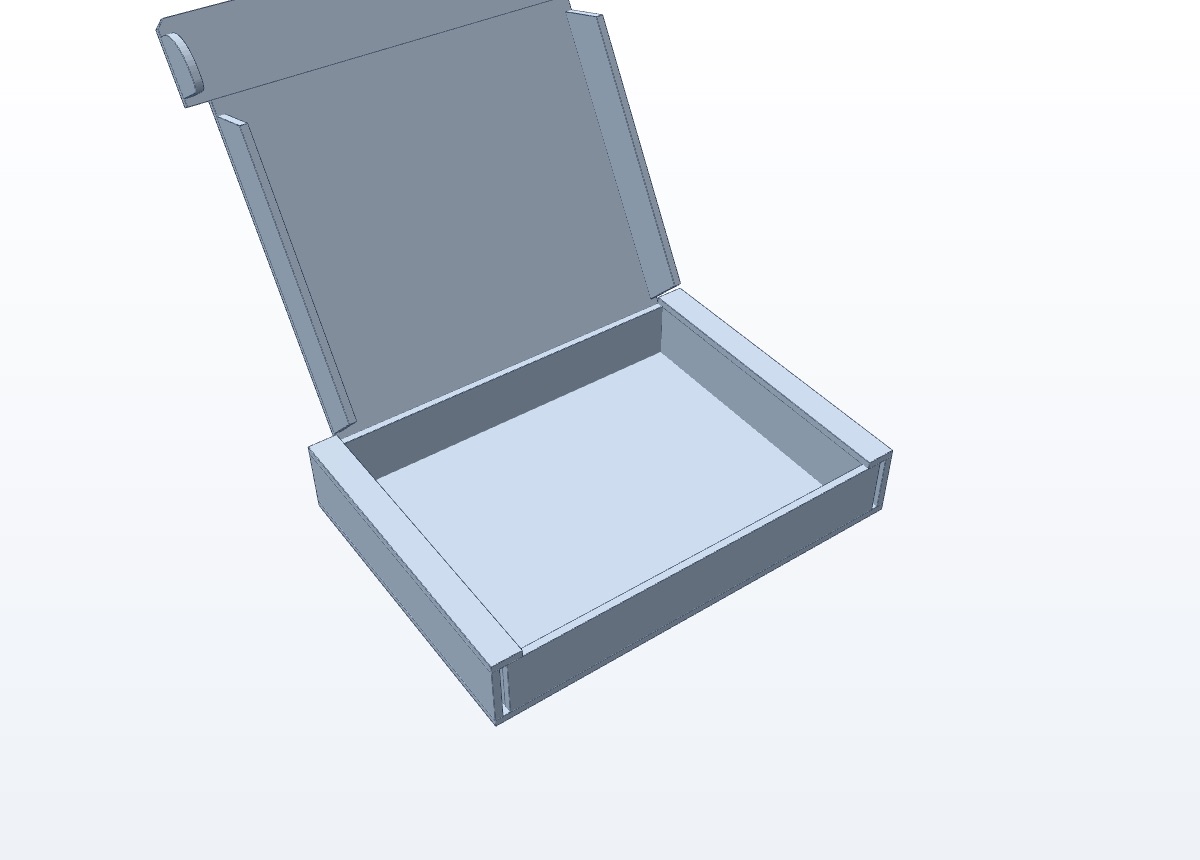
The Box designer is an online box template generator. It makes one proven box style in any size: a folding mailer box with a tuck-in lid, known in the packaging industry as a FEFCO 0427 style box. It is the kind of sturdy cardboard box that web shops use to ship books, electronics and gifts, and that opens like a little chest.
The box is made from a single flat sheet. It has:
- Double side walls that roll over and lock into the bottom with tabs, which makes the box strong and stiff.
- A hinged lid with ears that tuck inside along the side walls.
- A tuck flap that closes over the front, with two small side flaps that slide into the side walls and hold the lid shut.
- A flat top: lid and side walls are level when the box is closed.
No glue, staples or tape are needed: the box holds together because of the way it folds. You can open and close it again and again.
Who it is for
Anyone who wants a box that fits, instead of a box that is "close enough":
- Makers and hobbyists with a laser cutter who want neat packaging for their projects, electronics or 3D prints.
- Small businesses and web shops that ship a product of a fixed size and want a box without empty space, filler or wasted cardboard.
- Gift boxes for a special object: a book, a watch, a bottle-sized present, a set of tools.
- Storage: boxes for parts, cables, documents or sample sets that stack neatly.
- Prototypes: test a packaging idea before ordering hundreds of boxes from a packaging supplier.
- Schools, maker spaces and fab labs: a clear example of how a flat sheet becomes a strong 3D object.
Design a box in 6 steps
- Measure your object. Measure the width, depth and height in millimetres, at the widest points. If the object should be able to move a little, add a few millimetres.
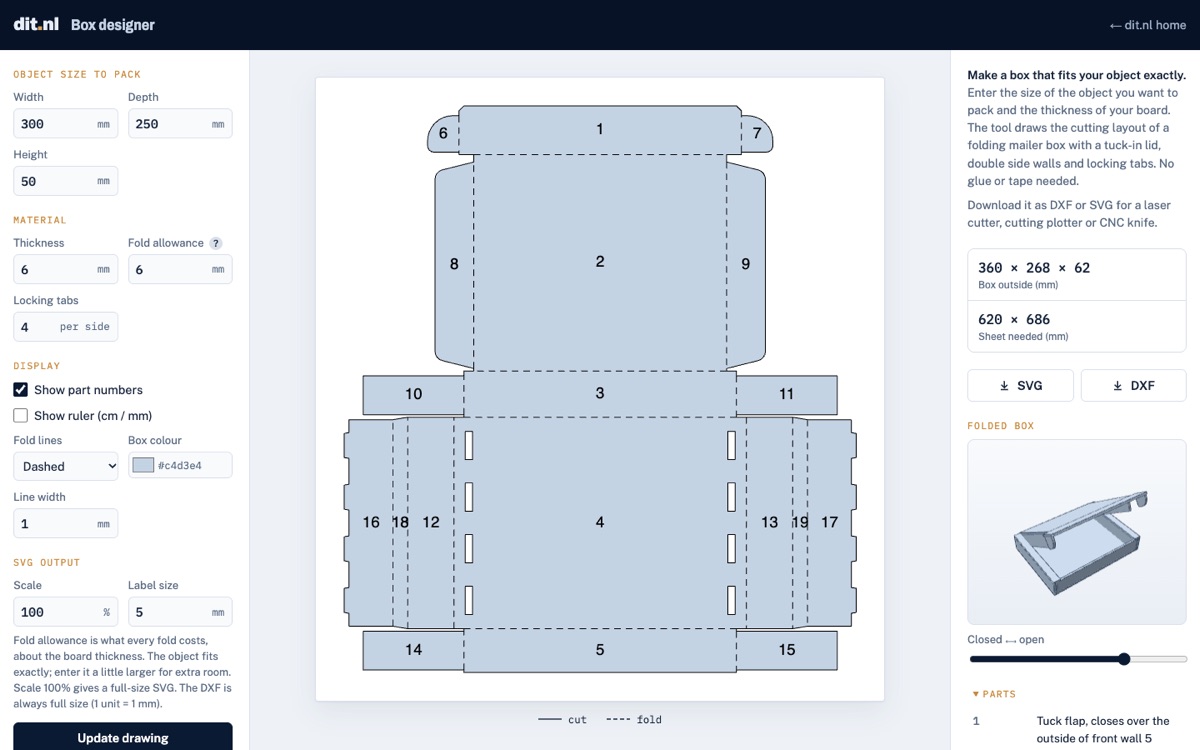
- Open the Box designer and enter the size under Object size to pack. The box is drawn around it straight away.
- Enter your board. Fill in the thickness of your cardboard and the fold allowance (about the same as the thickness; see choosing your board).
- Check the result. The drawing shows every part with a number; hover over a part to see its name. The 3D view shows the folded box; drag it to turn it and use the slider to open and close the lid. The panel on the right shows the outside size of the box and the size of the sheet you need.
- Download the DXF (for laser and CNC software) or the SVG (for plotters, Inkscape or printing).
- Cut, fold and pack. Cut the solid lines, fold on the dashed lines, and follow the folding steps.
All settings explained
You have a lot of freedom: any size from tiny to large, any board thickness, the number of locking tabs, and how the drawing looks. Everything updates immediately after you change a value.
| Setting | What it does | Default |
|---|---|---|
| Width, depth, height | The size of the object you want to pack, in mm. The inside of the box is exactly this size. | 300 × 250 × 50 |
| Thickness | Thickness of your board in mm. Walls, layers and slots are calculated from it. | 6 |
| Fold allowance | How many millimetres a fold costs. About the board thickness gives an exact fit; less makes the box tighter, more makes it looser. | 6 |
| Locking tabs | Number of tabs per side wall (1 to 12), spread evenly along the bottom. More tabs make long boxes stiffer. | 4 |
| Show part numbers | Shows the numbers 1 to 19 on the parts. | on |
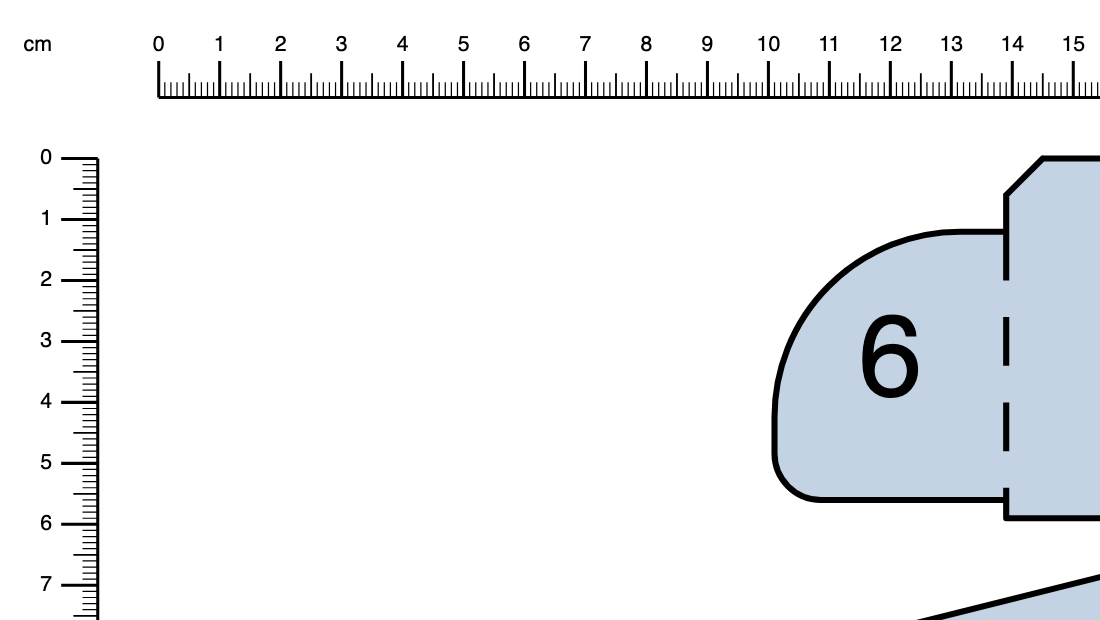
| Show ruler | Adds a ruler in cm and mm along the drawing, to check the size of a print. | off |
| Fold lines | Dashed, solid or off. | dashed |
| Box colour | Colour of the parts in the drawing and the SVG. | #c4d3e4 |
| Line width | Thickness of the lines in the drawing and the SVG, in mm. | 1 |
| Scale | Scale of the SVG download. 100% is full size. The DXF is always full size. | 100% |
| Label size | Size of the part numbers, in mm. | 5 |
Every setting is part of the page address. Bookmark or share the address, and the same box opens again.
Why the box fits exactly
Cardboard has a thickness, and every fold uses a bit of material. A box drawn with the object size as the panel size ends up too small. The Box designer does the maths for you:
- The inside is the object. The space inside the box is exactly the width, depth and height you enter. Room for the lid ears, which hang inside along the side walls, is added automatically.
- Every layer counts. Each side wall consists of four layers of board: the outer wall, the side flap of the lid, the dust flap and the inner wall. The bottom is wide enough for all of them.
- Every fold counts. Each panel is the inside space between its folds plus the fold allowance. With a fold allowance equal to the board thickness, the panel sizes match the formulas of published commercial FEFCO 0427 dielines.
- Everything closes. The ears, the tuck flap and its side flaps are shaped so they swing into place without hitting the walls or the bottom.
Do one test box with your own board first. If it comes out a little tight or loose, change the fold allowance by a millimetre.
The 19 parts of the box
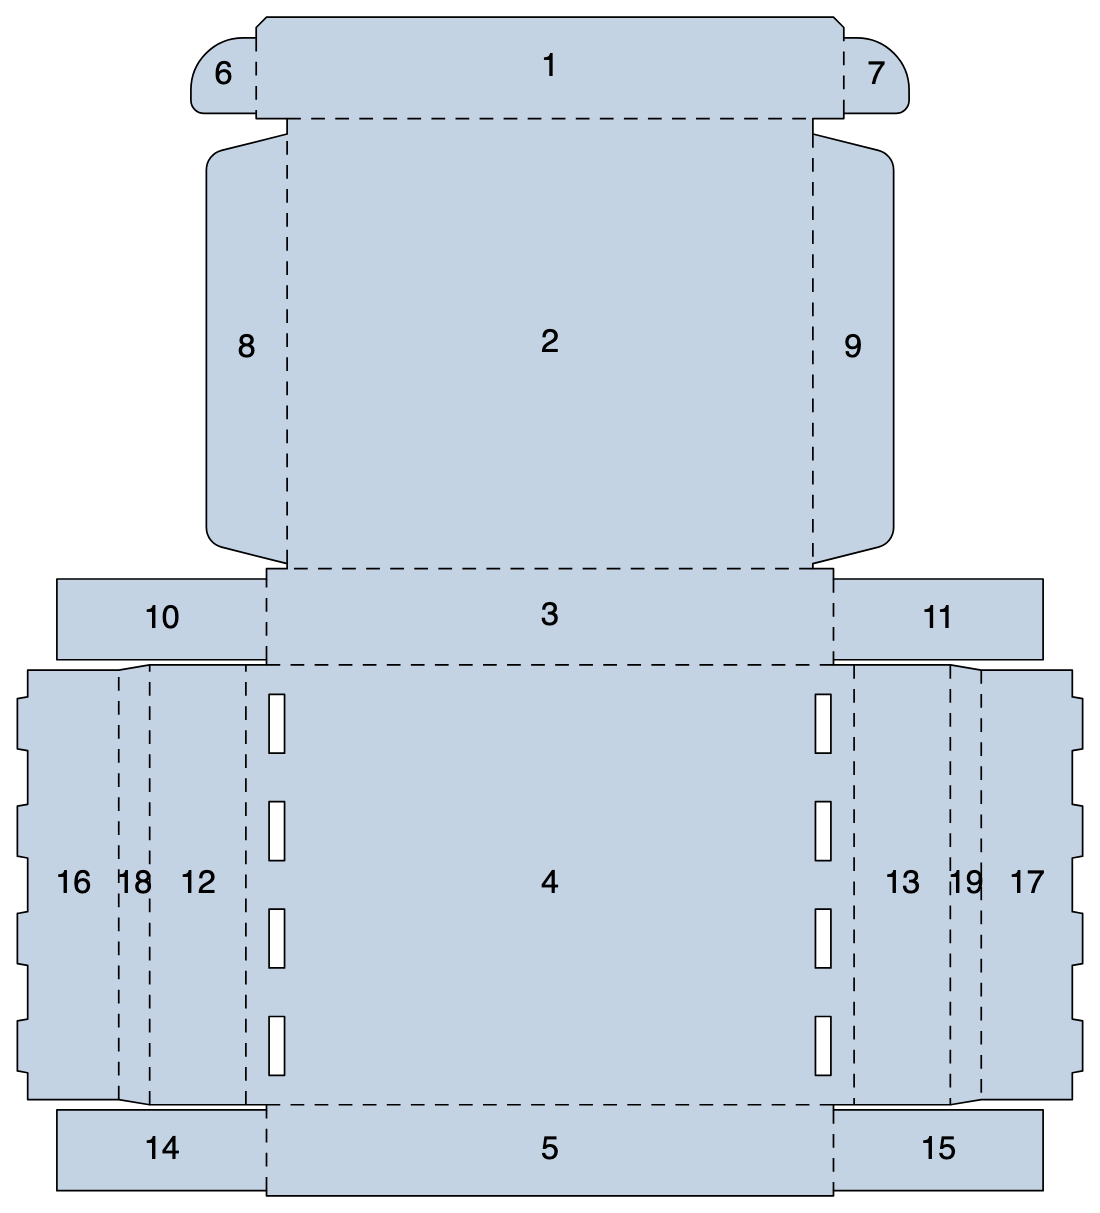
The cutting layout has 19 numbered parts. In the Box designer you can hover over a part to light it up and see its name; the matching line in the parts list lights up too.
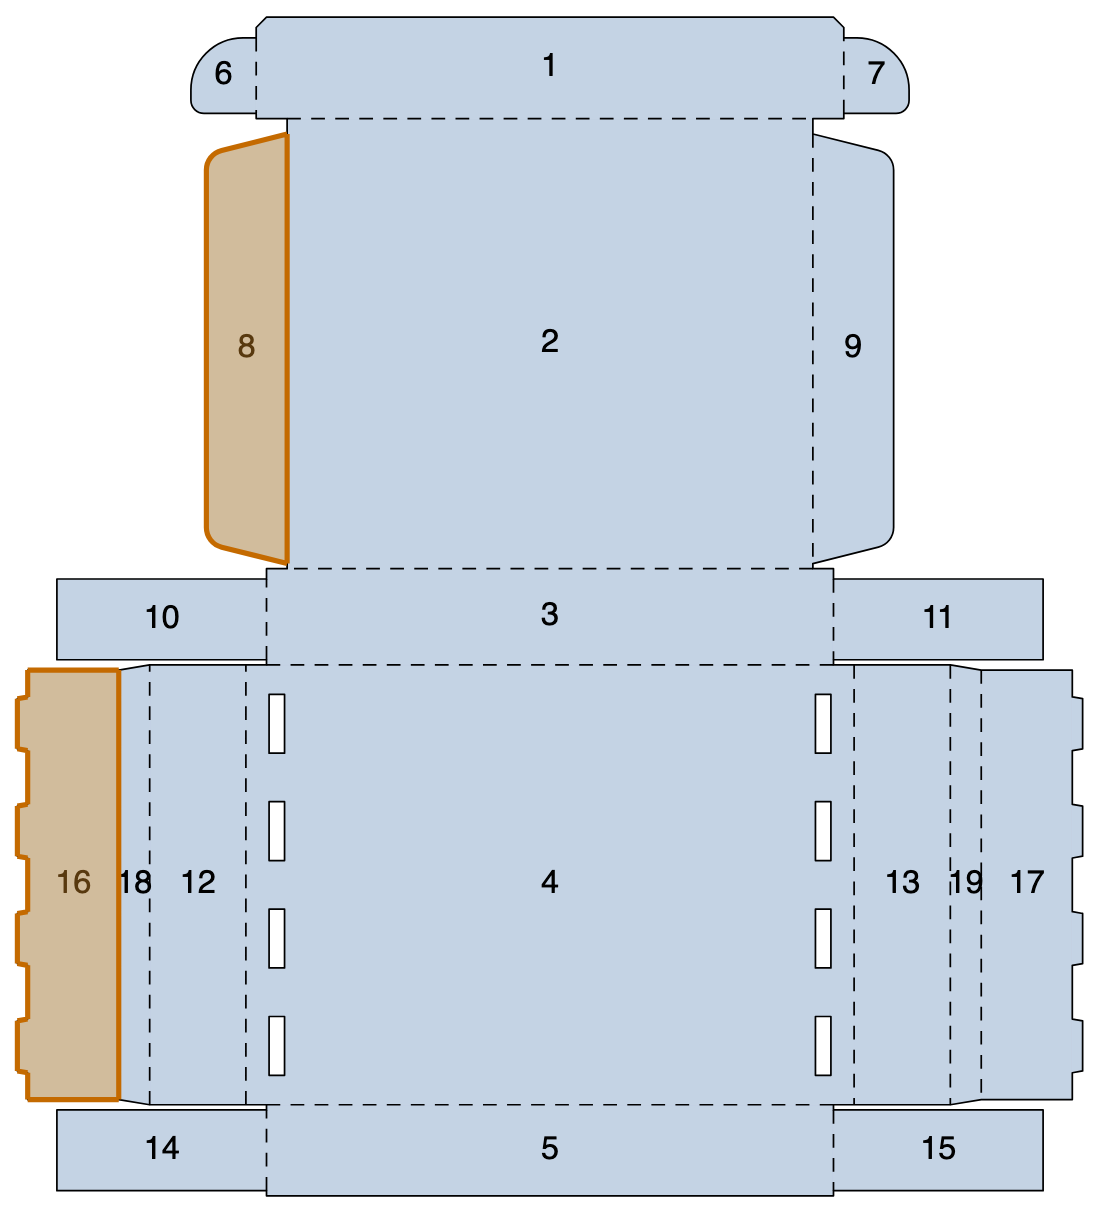
| Part | Name | Where it goes |
|---|---|---|
| 1 | Tuck flap | Closes over the outside of front wall 5, down to the bottom of the box. |
| 2 | Lid | Hinged at the back wall; level with the top of the side walls. |
| 3 | Back wall | Stands at the back, carries the lid. |
| 4 | Bottom | With the slots for the locking tabs. |
| 5 | Front wall | Stands at the front, under the tuck flap. |
| 6 · 7 | Tuck side flaps | Slide from the front into the side walls and keep the lid closed. |
| 8 · 9 | Lid ears | Hang inside the box along the side walls. |
| 10 · 11 | Back dust flaps | Fold inwards and sit inside the double side walls. |
| 12 · 13 | Outer side walls | The outside of the double side walls. |
| 14 · 15 | Front dust flaps | Like 10 and 11, from the front wall. |
| 16 · 17 | Inner side walls | Fold down inside, with locking tabs into the bottom. |
| 18 · 19 | Top strips | The top of the double side walls. |
DXF and SVG downloads
DXF: for laser and CNC software
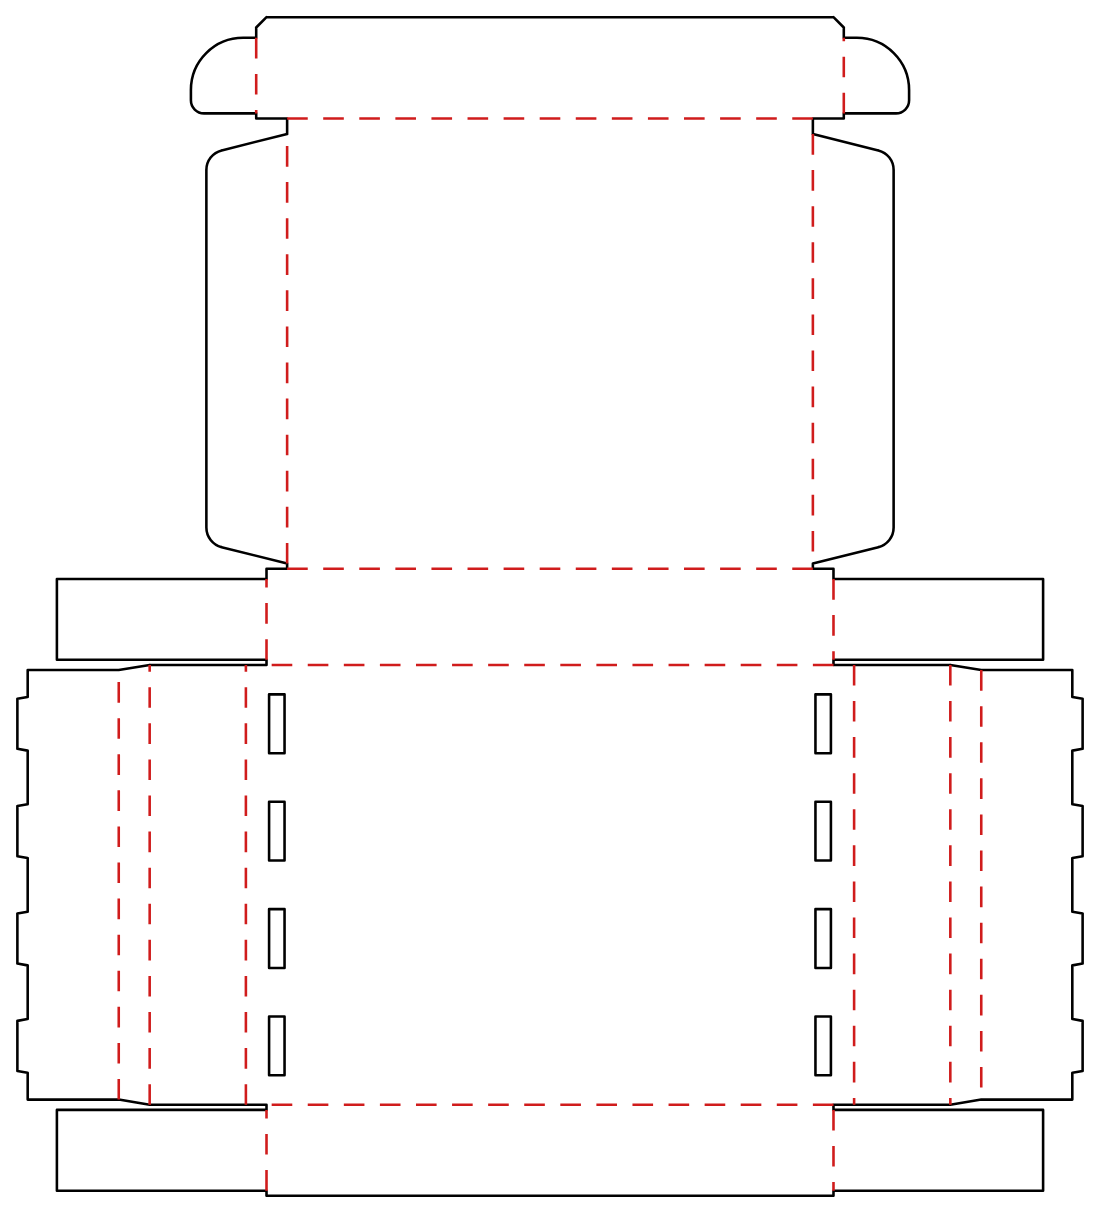
The DXF file is the cutting file for most laser cutter and CNC software. It is always full size in millimetres, and the unit is written in the file, so your software does not mistake it for inches. Cut lines and fold lines are on separate layers:
- Layer
CUT(black): cut all the way through. - Layer
FOLD(red): score, crease or engrave lightly, so the board folds neatly.
Because they are separate layers, you can give them different settings in your laser software: full power for cutting, low power or high speed for scoring. If you switch fold lines off in the Box designer, the DXF contains only the cut lines.
SVG: for plotters, Inkscape and printing
The SVG file looks exactly like the drawing on the page, with the box colour, line width and part numbers you choose. At scale 100% it is full size, so you can also print it or open it in a cutting-plotter program. A smaller scale is handy for a quick paper test model. The file name tells you the size and, if it is not 100%, the scale, for example box_300x250x50mm.svg or box_300x250x50mm_10_percent.svg.
Programs that open the files
DXF and SVG are standard formats. Laser software such as LightBurn, vector programs such as Inkscape, Adobe Illustrator and CorelDRAW, and CAD programs such as LibreCAD and AutoCAD open DXF files; most cutting-plotter software accepts SVG.
Choosing your board
The box works with any material that can be cut and folded: from thin card to double-wall corrugated board. Thicker board makes a stronger box; thinner board is easier to cut and fold. Enter the thickness you measured, and use the table as a starting point for the fold allowance.
| Material | Thickness (mm) | Fold allowance (mm) | Good for |
|---|---|---|---|
| Paper, thin card | ≤ 0.5 | 0.2 – 0.5 | Paper test models, very light gift boxes |
| Folding carton | 0.5 – 1 | 0.5 – 1 | Small gift and product boxes, plotter cutting |
| Corrugated E-flute | ≈ 1.5 | ≈ 1.5 | Small shipping boxes, retail packaging |
| Corrugated B-flute | ≈ 3 | ≈ 3 | General shipping boxes |
| Corrugated C-flute | ≈ 4 | ≈ 4 | Heavier and larger boxes |
| Double wall (BC) | ≈ 6 – 7 | ≈ 6 – 7 | Heavy, large or fragile contents |
Measure your board with a calliper or by stacking a few sheets, because the real thickness differs per supplier. Corrugated board folds differently along the flutes than across them, so make a test fold in both directions. Rigid greyboard does not fold well without special grooves and is less suitable for this box.
Laser cutting and other machines
CO2 laser
A CO2 laser is ideal for cardboard: it cuts corrugated and solid board cleanly and quickly. Import the DXF, set the CUT layer to cut through and the FOLD layer to a light score. Start with low power and high speed, and test on a scrap piece of the same board.
Diode laser
A diode laser can cut thin board and card, usually in several passes and slower than a CO2 laser. Brown and dark board absorbs the light better than white board. For thick corrugated board a diode laser is often too slow or not powerful enough.
Fibre laser
Fibre lasers are made for marking metal and are not suitable for cutting cardboard.
Cutting plotters
Craft cutting plotters cut paper, card and folding carton. Use the SVG at 100% and set the fold lines to score or perforate. Check the maximum thickness and cutting width of your machine.
CNC knife cutters
Flatbed digital cutters with a knife and a creasing wheel, as used by packaging companies, handle corrugated board of any thickness. Map the CUT layer to the knife and the FOLD layer to the creasing tool.
By hand
Print the SVG at 100% (check it with the ruler), stick it on the board and cut with a sharp knife and a steel ruler on a cutting mat. Score the fold lines with a blunt knife or a bone folder before folding.
Sheet size
The panel on the right of the Box designer shows the size of the sheet you need. Check that it fits on your board and in your machine before cutting.
Safety: cardboard burns. Never leave a laser cutter unattended, use air assist and ventilation, and keep a fire extinguisher at hand.
Folding the box
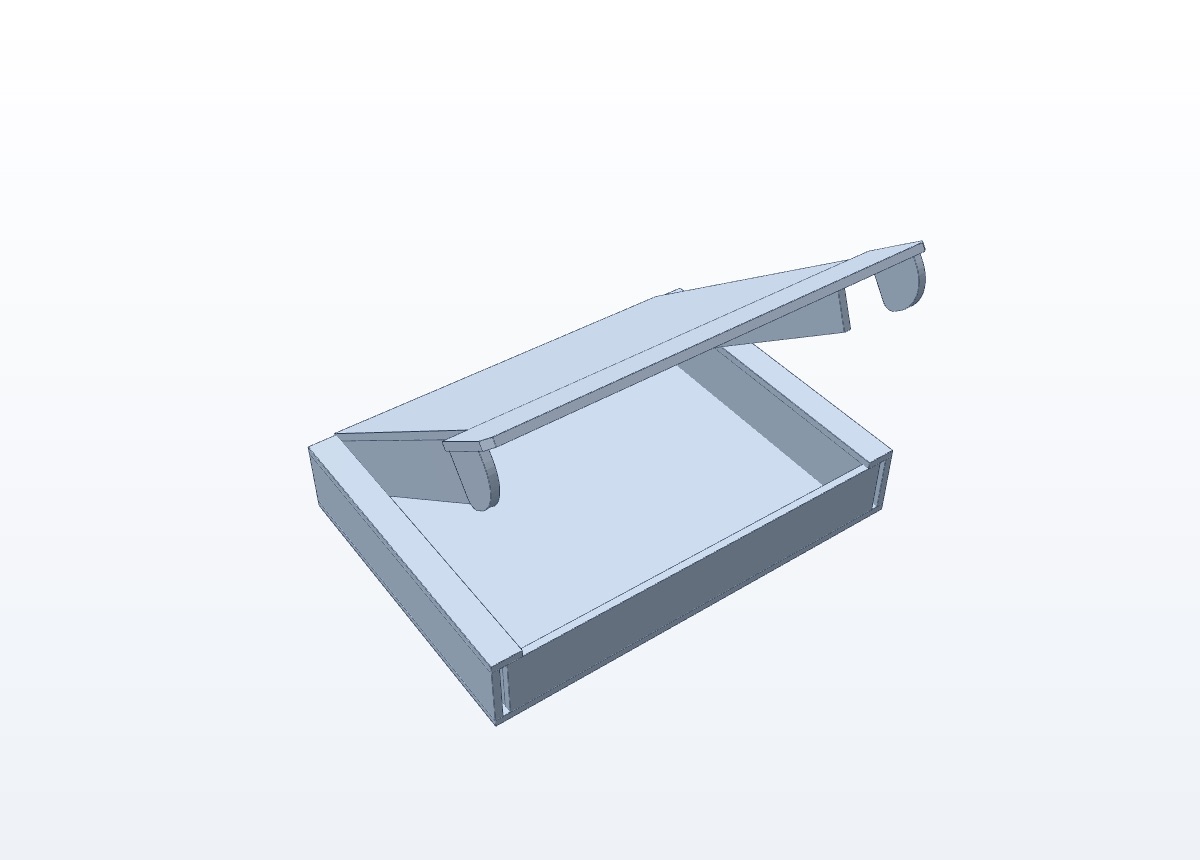
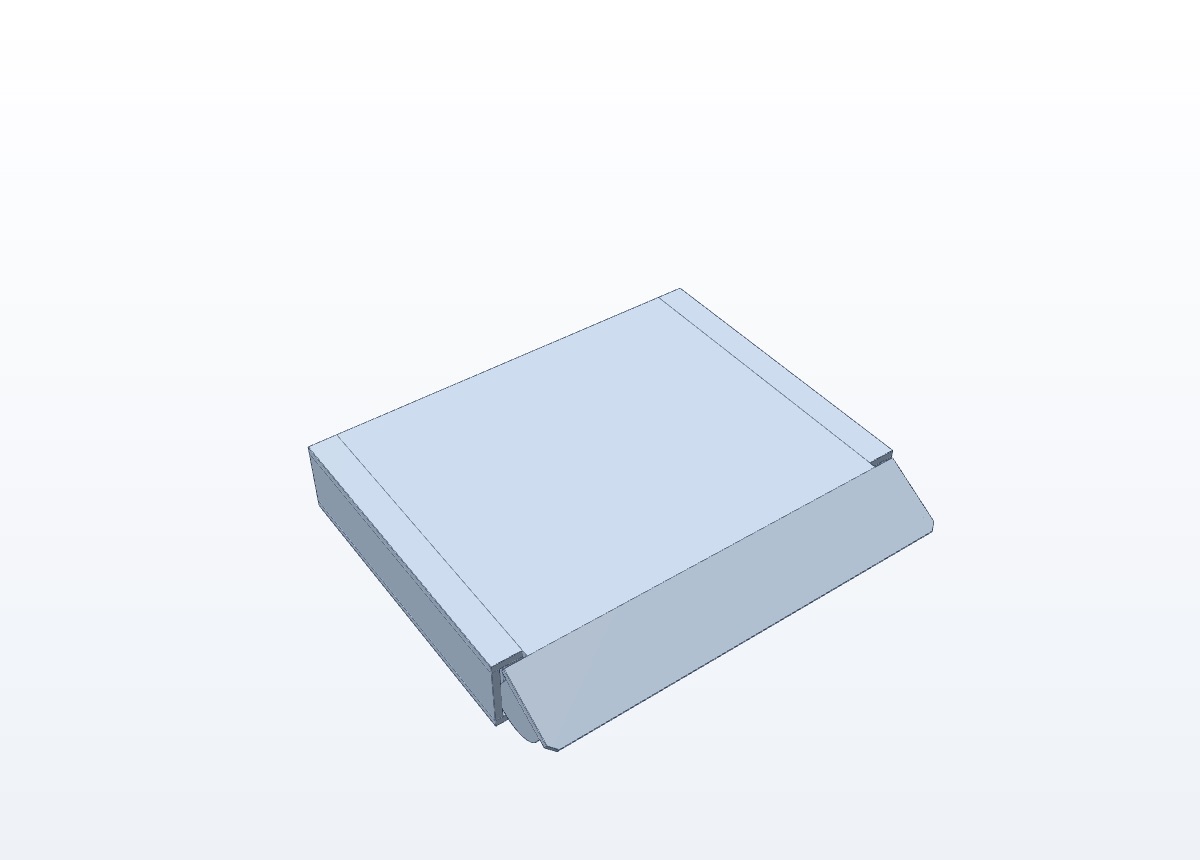
- Fold back wall 3 and front wall 5 up, and fold their dust flaps 10, 11, 14 and 15 inwards.
- Fold the outer side walls 12 and 13 up against the dust flaps.
- Fold the top strips 18 and 19 over and the inner walls 16 and 17 down into the box. Push their tabs into the slots in bottom 4.
- Put the object in and close lid 2: the ears 8 and 9 go down inside along the side walls.
- Fold tuck flap 1 down over the outside of front wall 5, and slide the side flaps 6 and 7 from the front into the side walls.
In the Box designer, the slider under the 3D view shows exactly this closing order.
Example boxes
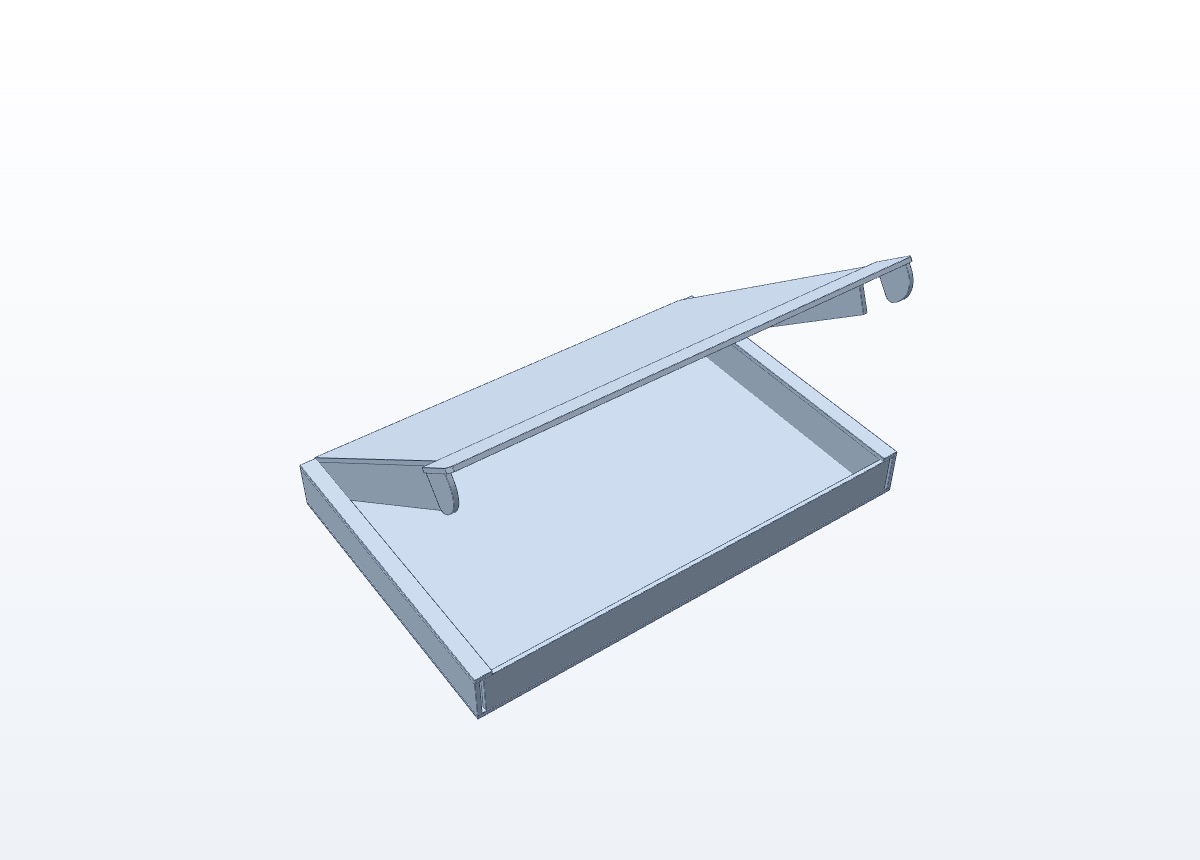
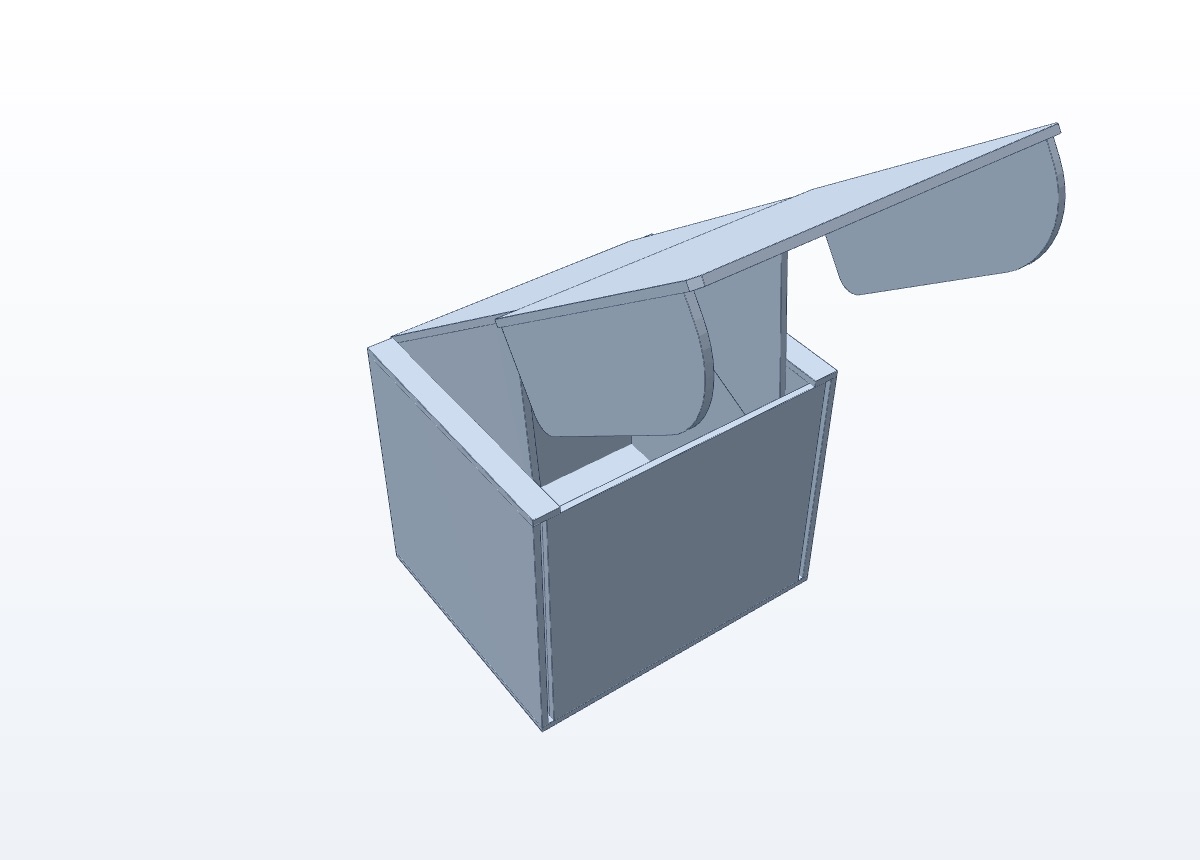
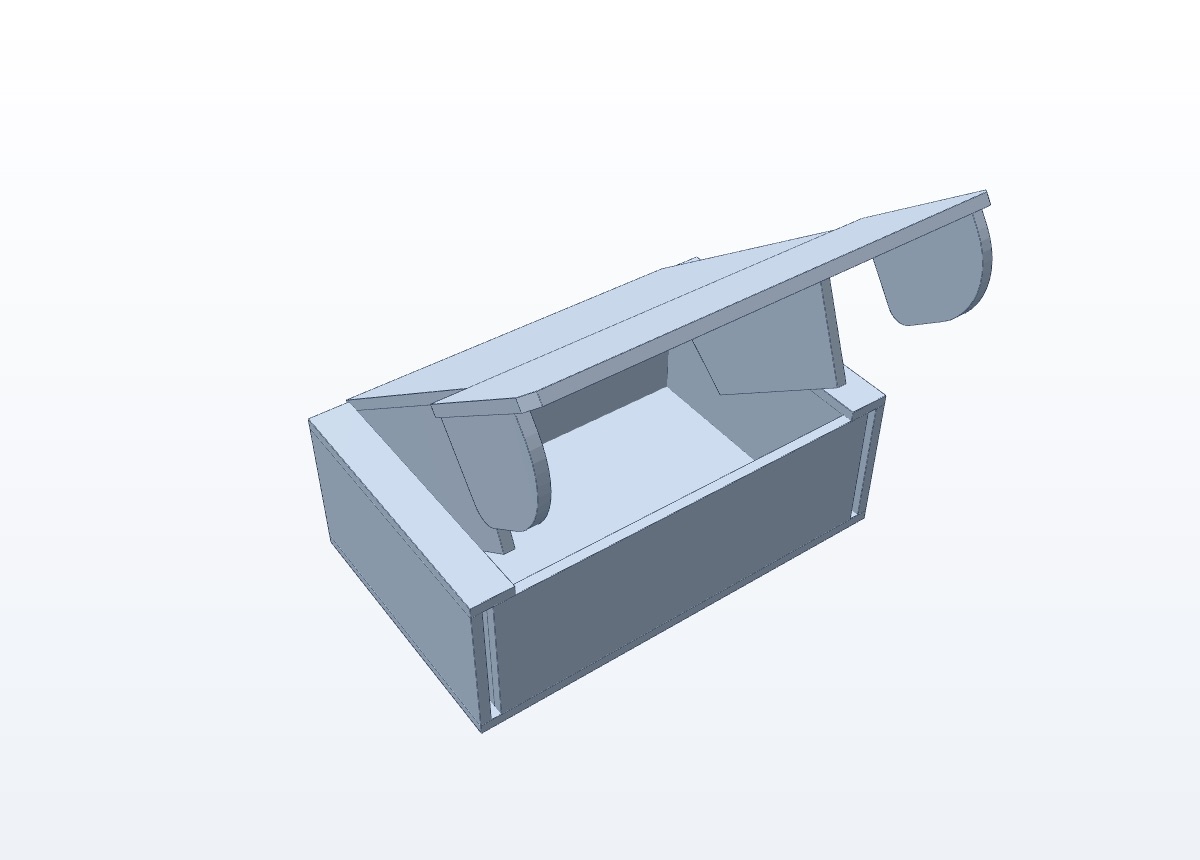
Click an example to open it in the Box designer with all sizes filled in, then change whatever you need.
Tips and troubleshooting
- Box too tight or too loose? Change the fold allowance by about a millimetre and cut again.
- Need room around the object? Enter the object a few millimetres larger. The inside of the box is exactly what you enter.
- Side flaps 6 and 7 hard to get in? Bend them slightly while sliding them into the side walls; stiff board needs a little more care.
- Tabs do not go into the slots? Check that the inner wall is folded fully down; the slots have some play around the tabs.
- Print or cut came out the wrong size? Switch on the ruler and measure. In your software, make sure the DXF is imported in millimetres and the SVG at 100%.
- Long box bends? Use more locking tabs or thicker board.
- Folds crack? Score the fold lines a little deeper, or fold along the flutes of corrugated board where possible.
Frequently asked questions
Does the box need glue or tape?
No. The double side walls lock into the bottom with tabs, and the lid closes with a tuck flap whose side flaps slide into the side walls.
Do I need to install anything or make an account?
No. The Box designer runs in your web browser. The 3D view needs a browser with WebGL, which all current browsers have.
In which unit are the files?
Millimetres. The DXF says so in its header and is always full size. The SVG is full size at scale 100%.
Will my object really fit?
The inside of the box is exactly the size you enter. With a fold allowance of about the board thickness, the panel sizes match published commercial FEFCO 0427 dielines. Make one test box with your own board to be sure.
Which box style is it?
A folding mailer box with a tuck-in lid and double side walls, also known as a FEFCO 0427 style box or a roll end tuck front box.
Can I make a very small or a very large box?
Yes. The design adapts to any size and board thickness; the only limits are your sheet and your machine. The page shows the sheet size you need.
Can I cut it with a diode laser or a cutting plotter?
Yes, if the machine can cut your board and the sheet fits. CO2 lasers handle corrugated board easily; diode lasers and plotters work best with thinner board and card.
Can I share a design?
Yes. All settings are in the page address; copy it and anyone who opens it sees the same box.
Ready to make your box?
Enter your sizes and download the cutting file.